Building tips ( Pg 1 ) and guide
This page is in the process of evolving into the Building tips and hints page
This page will be evolving into a building a painting tips page.
To begin: What is polystyrene: Polystyrene is the white plastic that I use to vacuum form the canopy/fuselage bodies. Its known by vendors and manufacturers as H.I.P.S. High impact polystyrene. Its very easy to work with, glue and paint. Its somewhat durable for its application. Not saying its design for people who have not yet mastered flying and landing. I would not suggest putting on a full fuselage until certain hurdles of the learning curve has been accomplished. For gluing, I use testors plastic model cement (orange tube) which Ive found to work best. The so called non-toxic cement does not produce the same quality bond. Painting: I use krylon brand spray paint found at walmart (cheapest place for price). I dont recommend primer before painting. You can lightly sand the surfaces to be painted with a 400-600 grit sandpaper. Usually there is no problem with the paint sticking.I do advise cleaning the plastic first with soap and water to remove any oils that may be on the plastic. (note all plastics are an oil based product) IE: some type of petrolleum product is used in its manufacturing.
What is PETG ?: PETG is a copolyester developed to achieve measurably improved sheet clarity and edge color while maintaining the performance characteristics for which PETG has become known in the industry. It offers the thermoformability and ease of fabrication along with significantly improved clarity. It has the durability and impact resistance of polycarbonates(Lexan) PETG is used in packaging such as battery packagings, Soda bottles, product packaging such as computer parts etc...To atest to its durability, you actually need a cutting tool to open the packaging. Its tough. Its harder to glue and harder to paint but its not impossible.Ive found that "Goop" works excellent in gluing this material and is found at most hardware and home centers. For painting I will include this link for now : http://www.apexrc-racing.com/petg.htm
Note, in my personal testings Ive found that the PETG is actually stronger than LEXAN(r) .My testing including compression which concluded that the PETG is much more able to pop back into shape but it will crease but not as much as Lexan. Another test was to start a cut with sissors and then try to physically tear the plastic sheet of PETG and LEXAN .The LEXAN tore much easier than the PETG. And another surprise was I was using a thinner (.020) PETG plastic sheet and a thicker (.030) Lexan sheet. In my testings I found PETG hands down a better material than the Lexan.
These kits are made from high impact Vac formed polystyrene and or PETG. These kits come with instructions and are unfinished(unpainted)Some assembly is required. But dont worry, Its simple.
Special note: These are not recommended for beginner fliers. Once you have mastered the art of hovering, landing and forward flight, including nose in, then put on the new suits. Though they are crash resistant they arent crash proof, no different from larger heli bodies. For the beginner with some flying abilities I suggest the Hughes 300C.
Basic fuselage Assembly
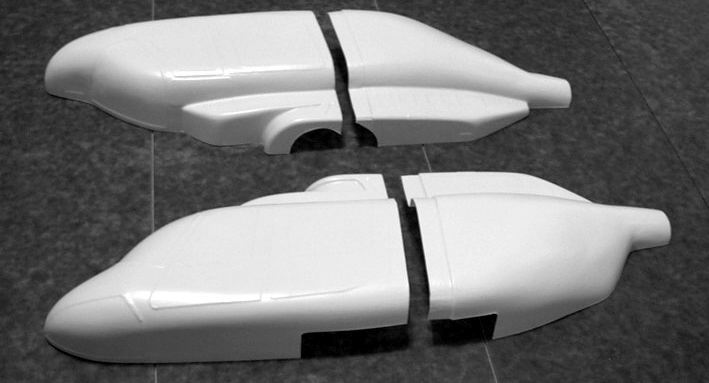
Cut out fuselage halves including tailboom. If you plan on removing any windows this will be a good time to do so. Some fuselages have a glue flange premolded into one of the halves.
In some areas such as the tailboom and molded tailfin the glue flange may need to be trimmed pretty narrow to get a good fit.
Joining/seam and screw strips
For a better alternative see building tips pages 2-3
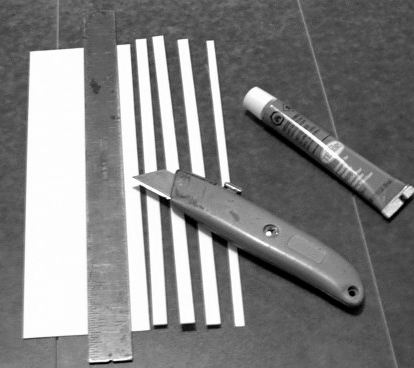
Cut seam strips from supplied plastic sheets. These usually will be glued to one half of the inside of the fuselage, if there is no molded flange. On the nose portion/half of the fuselage, the seam strip will be used all the way around. After seam strip is glued to one half and dried, you can now glue the other half of fuselage together with its matched side. Note that seam strips width may vary. As a norm I cut mine 1/8-3/16" wide for tailbooms and about a 1/4-1/2" wide for main fuselage. I make my fuselages so that it is screwed together at the bottoms. I screw strip is installed to one side of the fuselage. The other side will not be glued but screwed together which will make removing and installing fuselage easy. Screw strips are wide enough that when fuselage halves are brought together you will be able to install screws.
Seam strips installed
Pic on left shows seam strips installed on inside of forward fuselage. The rear fuselage will have seam strips only installed on upper portion of rear fuselage half. The bottom rear fuselage will utilize screw strip/s which the screw strip is glued to one half of the fuselage
Rear bottom screw strip/tab
Screw strip/ Tab installed. The length is determined by how many screws you plan to use on the fuselage. Some fuselages may need several. This Zoom Jet Ranger fuse only needs one IMO. Another alternative is to install strips on one side of the fuselage to form a channel or slot so that the opposite side of fuselage would fit into the slot and the fuselage bottom could be held together with a small strip of clear tape.

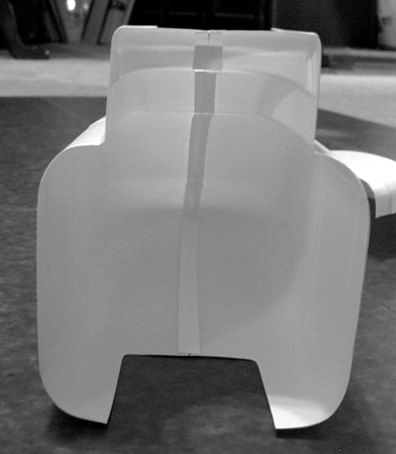
Fuselage is basically assembled
Note the screws holding the front and rear fuselage halves together.There is a molded flange on the rear fuselage half which is used for a screw flange. Be sure you do not cut this off or you will have to find an alternative to secure the front and rear halves together. When installed on the helicopter frame removing the screws should be all you need to do to swap batteries.
Not seen is a screw that is located on the top rear boom stub to secure the tailboom to the fuselage.
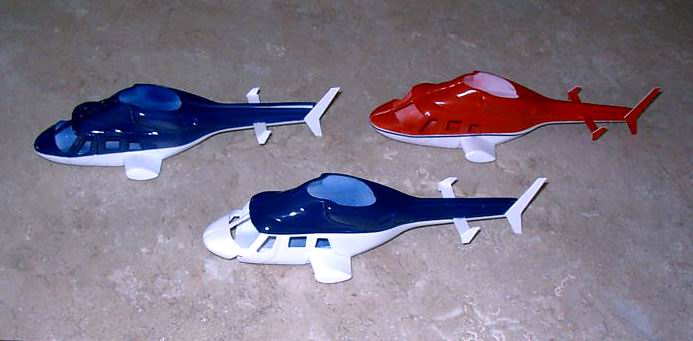
Fuselage is ready forpaint
Building thread links (www.rcgroups.com)
Trex Hind D http://www.rcgroups.com/forums/showthread.php?t=389654
KA-50s http://www.rcgroups.com/forums/showthread.php?t=453887
Comanche http://www.rcgroups.com/forums/showthread.php?t=178222
Dauphin http://www.rcgroups.com/forums/showthread.php?t=195125
A109 http://www.rcgroups.com/forums/showthread.php?t=251392
Jet Ranger http://www.rcgroups.com/forums/showthread.php?t=521079#post5515480
Blackhawk http://www.rcgroups.com/forums/showthread.php?t=792133
AH-1 Cobra http://www.rcgroups.com/forums/showthread.php?t=700379
AH-64 Apache http://www.rcgroups.com/forums/showthread.php?t=781123
Also Building services available:
Im offering the service to prebuild and or Paint a kit
Please email me for quote for a prebuilt and or paint fuselage Email Addy: darthdrk@juno.com
Extra Tailboom covers:
Fuselage notes:
Note that some(most) fuselages now come with a moulding flange already molded into one half of the fuselage and so it is also with other arts that are to be assembled.
Painting recommendations:
Before painting It is recommended that the body has been test fitted as if it were ready for flight. Trim for control linkages etc... Make sure not control linkages are rubbing against fuselage. Unmount fuselage and begin the painting process. Some of the best paint jobs are done by keeping it simple. Styrene: it is not necessary to sand the surface before painting but it is advisable to clean the surface as to remove any petroleum residue. Believe it or not, plastic is a peteroleum manufactured product. Use soapy water. Personally, I havent experienced the need to wash the styrene plastic but I guess it wouldnt hurt. If not installing clear windows you will have to mask the windows and paint them your desired color (normally windows are painted black) Paint windows last. If installing clear windows, paint fuselage first then install the windows using a canopy glue or a product found at hardware and home centers.
Masking: You can use regular masking tape or even clear tape. I find that clear tape leaves a cleaner line.
Paint: I recommend Krylon brand spray paints, found at the price at your local walmart. One caution about Krylon brand paint It seems in my experience that its not a good idea to use the Camouflage colors. They go on good and look good for about a week. It seems as if the Camo paints have a long cure time and its during this time that it deforms the plastic. This dosent seem to be so with the satins and gloss Krylon paints.
Another paint base I would recommend is acrylic based paints
Try not mixing different brands of paint because some paints will interact with one another and cause a cracking effect. Test your paint on scrap plastic.
PETG Bodies will have to be painted in the same manner as RC car bodies are painted using the same paint that is used on RC Car bodies